

Adding Signatures to Outlook
Email signatures are an important part of any professional email communication. They serve as a virtual business card, providing recipients with your contact information and other important details. In this blog post, we will guide you through the process of adding a signature to your emails in Outlook.
-
Step 1: Open Outlook
The first step to adding a signature in Outlook is to open the application. Once you have opened Outlook, click on “New Email” to start a new email message.

-
Step 2: Click on “Signature” in the Toolbar
In the email message window, click on the “Signature” button in the toolbar. This button is located in the top-right corner of the window, next to the “Attach File” button.

-
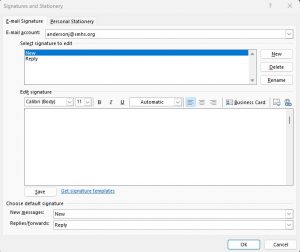
Step 3: Click on “Signatures” in the Dropdown Menu
After clicking on the “Signature” button, a dropdown menu will appear. Click on “Signatures” in the menu to open the “Signatures and Stationery” dialog box.

-
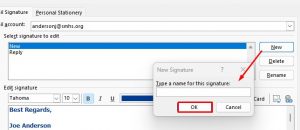
Step 4: Create a New Signature
In the “Signatures and Stationery” dialog box, click on “New” to create a new signature. This will open a new window where you can type in the text of your signature.
-
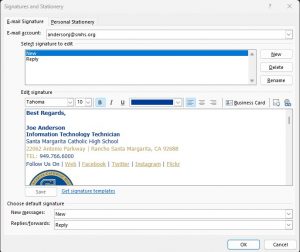
Step 5: Customize Your Signature
In the new signature window, you can customize your signature to your liking. You can add your name, job title, company name, contact information, and other relevant details. You can also choose the font, size, and color of your signature.
-
Step 6: Add an Image or Logo to Your Signature
If you want to add an image or logo to your signature, click on the “Picture” icon in the signature window. This will allow you to upload an image or logo from your computer.

-
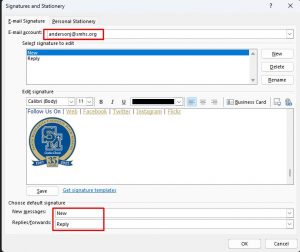
Step 7: Assign Your Signature to Your Email Account
After customizing your signature, click on the “OK” button to save it. You can now assign your signature to your email account by selecting it from the dropdown menu in the “Signatures and Stationery” dialog box. you can also create a reply signature that is less detailed and assign them to new and reply emails.
-
Step 8: Test Your Signature
Before sending any emails with your new signature, it’s important to test it to make sure everything looks and works as intended. Send a test email to yourself or a colleague to ensure that your signature appears as expected.
